Chassis Dolly
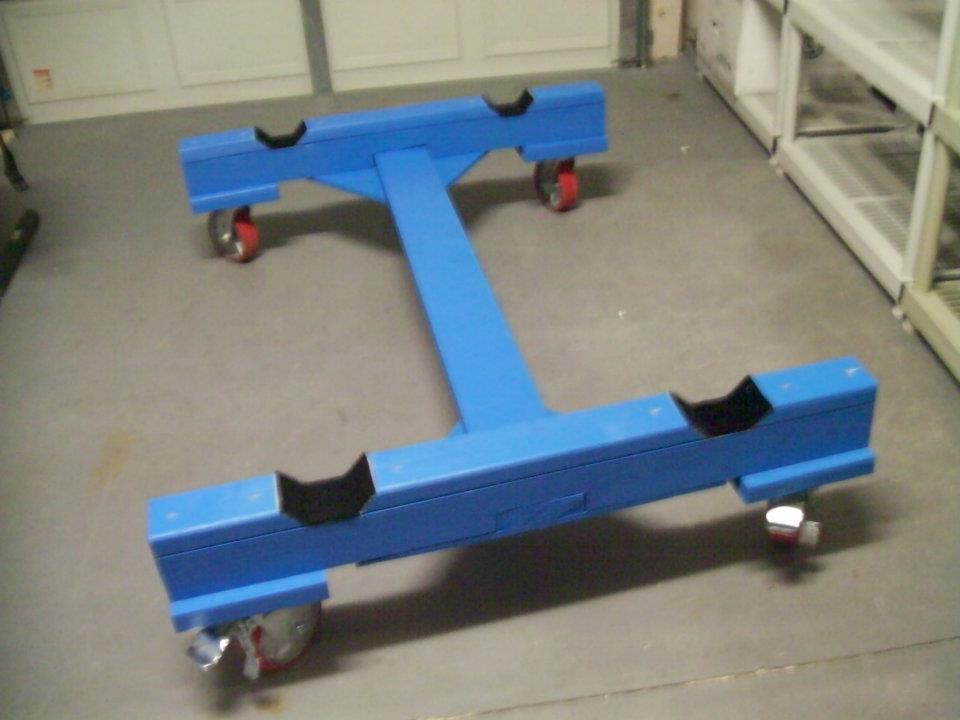
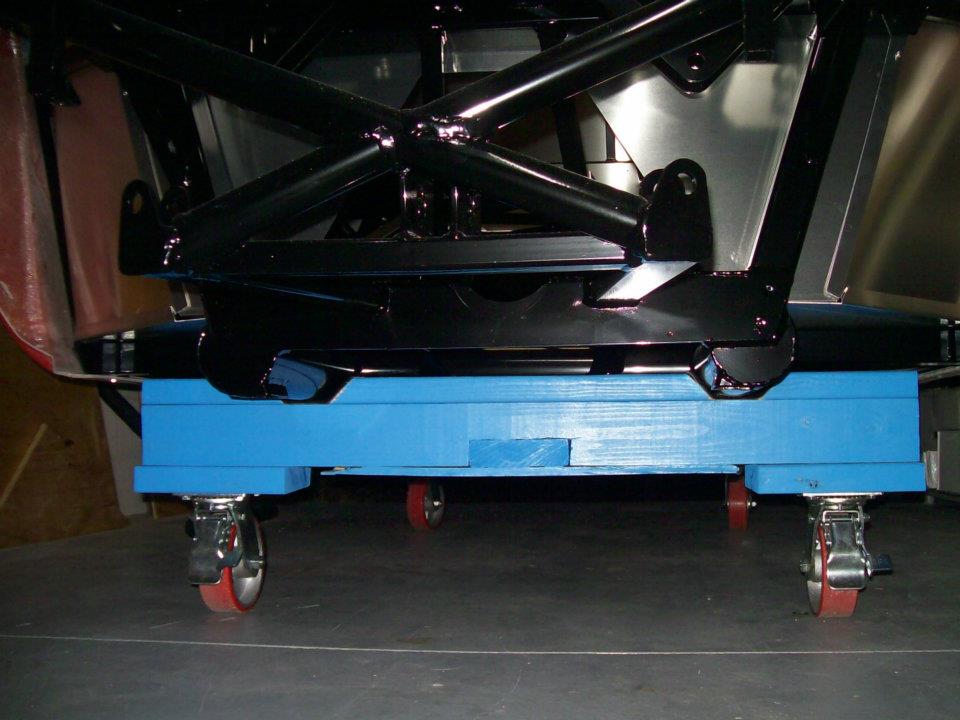
Today I built this chassis dolly.
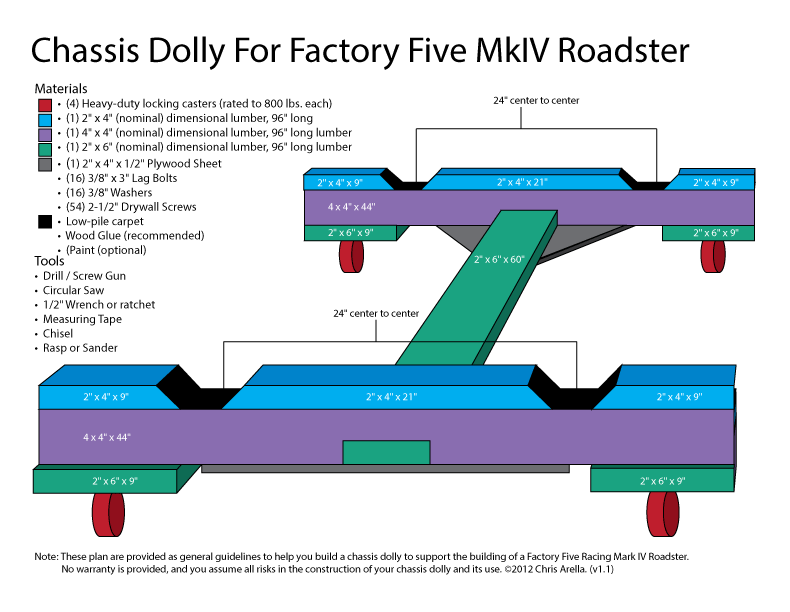
Click here to download the PDF.
Tools
- Drill / Screw Gun
- Circular Saw
- 1/2″ Wrench or ratchet
- Measuring Tape
- Chisel
- Rasp or Sander
Materials
- (1) 2′ x 4′ x 1/2″ Plywood Sheet
- (1) 2″ x 4″ (nominal) dimensional lumber, 8′ long
- (1) 4″ x 4″ (nominal) dimensional lumber, 8′ long lumber
- (1) 2″ x 6″ (nominal) dimensional lumber, 8′ long lumber
- (16) 3/8″ x 3″ Lag Bolts
- (16) 3/8″ Washers
- (52) 2-1/2″ Coarse Drywall Screws
- (4) Heavy-duty swivel casters – 800 lb. rating; 2,400 lbs total capacity.
- (2) Locking Casters
- (2) Standard Casters
- Low pile carpet, enough to yield (4) 3-1/2″ x 12″ strips
- Wood Glue (recommended)
- Paint (optional)
Steps
Squarely cut your 4″ x 4″ lumber into (2) 44″ lengths.
Squarely cut your 2″ x 4″ lumber into (2) 21″ length pieces.
Cut each 21″ piece with a 45° angle inward at both ends of each piece, so that their final length is 21″ at the longest point.
Cut your remaining 2″ x 4″ lumber into (4) 9″ lengths with a 45° angle at one end of each piece.
Squarely cut your 2″ x 6″ lumber into (1) 60″ length, and (4) 9″ lengths.
On each of your 4″ x 4″ x 44″ lumber, place marks 19-1/2″ from each end so that they are 5-1/2″ apart at the center.
Set a depth of 1-1/2″ on your circular saw, and cut grooves across the face of your 4×4 within the 5-1/2″ wide area at the center.
Chisel out the grooves and sand down the rough pieces to smooth out the opening flat as needed.
If you are going to paint your dolly, now is the time to do it while you have everything apart. Once dry, you can assemble it.
Using (4) 2-1/2″ drywall screws, join a 2″ x 4″ x 9″ piece flush to one end of your 4″ x 4″ x 44″ piece on the top, so that the 45° cut is angled inward.
Repeat joining another 2″ x 4″ x 9″ piece flush to the other end of your 4″ x 4″ x 44″ piece on the top so that the 45° cut is angled inward.
Using (4) 2-1/2″ drywall screws, join a 2″ x 6″ x 9″ piece flush to one end of your 4″ x 4″ x 44″ piece on the bottom.
Repeat joining another 2″ x 6″ x 9″ piece flush to the other end of your 4″ x 4″ x 44″ piece on the bottom. You now have the front and rear bases complete.
Flip the front and rear bases upside-down to expose the slot in the bottom.
Slide the 2″ x 6″ x 60″ cross brace into the slots, to join the front and rear platforms and screw them together using (2) 2-1/2″ Drywall screws at each end.
Cut (2) triangular pieces of plywood such that two legs are approximately 24″ long and the other is 18 long.

Join a triangular piece of plywood to each end of your dolly, such that the short end follows the long, outside edge of the base. Screw down each piece of plywood using (5) 2-1/2″ drywall screws. Make sure to put (3) into the base and (2) into the 2″ x 6″ x 60″ cross brace. This will help to keep the dolly from torquing when rolling your chassis around the shop.
Using your lag bolts, fasten your casters to each corner of your dolly.
Flip it over.
In the recesses where the chassis will sit, apply some liquid nails and tack your carpet strips in place. This is to protect the bottom of the chassis from getting scratched.
Let dry completely per the directions on the Liquid Nails.
Enjoy!
Note: These plan are provided as general guidelines to help you build a chassis dolly to support the building of a Factory Five Racing Mark IV Roadster. No warranty is provided, and you assume all risks.




Trackbacks for this post